- Published on
Pytorch (2-2) - 손 글씨 분류하기
- Author

- Name
- yceffort
손글씨 분류하기 (MNIST)
머신러닝의 단골 주제다. 손글씨를 분류해보자. 이전 데이터와 다른 점이라고 한다면, 이전 데이터는 표 형식이었지만, 이제는 이미지 형식으로 구성되어 있다.
import torch
from torch.autograd import Variable
import torch.nn as nn
import torch.nn.functional as F
import torch.optim as optim
from torch.utils.data import DataLoader, TensorDataset

from sklearn.datasets import load_digits
from sklearn import datasets, model_selection

from matplotlib import pyplot as plt
from matplotlib import cm

import pandas as pd

%matplotlib inline
데이터를 가져오자. 근데 어찌된 일인지, MINST original데이터를 가져오는데 계속해서 여룽밍 있어서 다른 방법을 사용하였다.
from scipy.io import loadmat
mnist_alternative_url = "https://github.com/amplab/datascience-sp14/raw/master/lab7/mldata/mnist-original.mat"
mnist_path = "./mnist-original.mat"
response = urllib.request.urlopen(mnist_alternative_url)
with open(mnist_path, "wb") as f:
    content = response.read()
    f.write(content)
mnist_raw = loadmat(mnist_path)
mnist = {
    "data": mnist_raw["data"].T,
    "target": mnist_raw["label"][0],
    "COL_NAMES": ["label", "data"],
    "DESCR": "mldata.org dataset: mnist-original",
}
print("Success!")
mnist
여기에는 다음과 같은 필드가 있다.
- COL_NAMES: 데이터 집합의 각 컬럼명
- DESCR: 데이터 집합의 설명
- data: 손글시 이미지 픽셀값
- target: 손글씨 이미지 숫자 레이블 (0~9)
# 데이터 정규화
mnist_data = mnist['data'] / 255

pd.DataFrame(mnist_data)
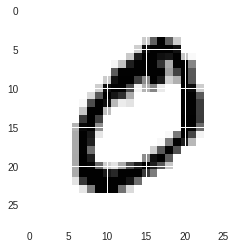
첫번째 이미지 출력
plt.imshow(mnist_data[0].reshape(28, 28), cmap=cm.gray_r)
plt.show()
mnist_label = mnist['target']
mnist_label
테스트 데이터와 훈련 데이터 분리
train_size = 50000
test_size = 500
train_X, test_X, train_Y, test_Y = model_selection.train_test_split(mnist_data,
                                                                    mnist_label,
                                                                    train_size=train_size,
                                                                    test_size=test_size
                                                                   )
이번에는 gpu를 사용해 보고자 한다. 데이터의 크기도 그렇고, 훈련할게 많아서 좀더 빠르지 않을까..?
device = torch.device("cuda:0" if torch.cuda.is_available() else "cpu")

train_X = torch.from_numpy(train_X).float().to(device)
train_Y = torch.from_numpy(train_Y).long().to(device)


test_X = torch.from_numpy(test_X).float().to(device)
test_Y = torch.from_numpy(test_Y).long().to(device)

print(train_X.shape)
print(train_Y.shape)
gpu를 사용하기 위해선 위와 같이 변수 부터 cuda로 지정해주어야 한다.
데이터셋을 만들고 100개 짜리 미니 배치로 만들자.
train = TensorDataset(train_X, train_Y)
train_loader = DataLoader(train, batch_size=100, shuffle=True)
신경망을 만든다. 이번에 만들 신경망은 다음과 같다.
입력층, 출력층이 각 1개씩 이고, 중간층이 5개다. 입력층의 노드는 784개 이고 (28x28픽셀 이미지라 784개의 입력변수가 있다.) 중간층 노드는 256개와 128개, 출력층 노드의 개수는 10개 (0~9 구별)다.
class Net(nn.Module):
  def __init__(self):
    super(Net, self).__init__()
    self.fc1 = nn.Linear(784, 256)
    self.fc2 = nn.Linear(256, 256)
    self.fc3 = nn.Linear(256, 256)
    self.fc4 = nn.Linear(256, 128)
    self.fc5 = nn.Linear(128, 128)
    self.fc6 = nn.Linear(128, 10)


  def forward(self, x):
    x = F.relu(self.fc1(x))
    x = F.relu(self.fc2(x))
    x = F.relu(self.fc3(x))
    x = F.relu(self.fc4(x))
    x = F.relu(self.fc5(x))
    x = F.dropout(x, training=self.training)
    x = self.fc6(x)
    return F.log_softmax(x)

model = Net()
model.cuda()
이전 예제와 다른게 있다.
Dropout
드롭아웃은 Overfitting을 방지하기 위한 방법이다.
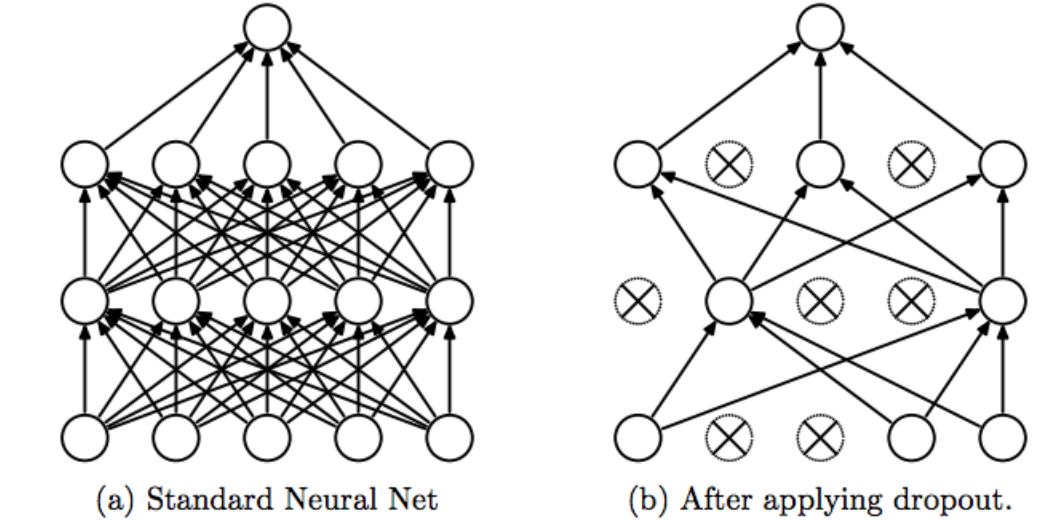
일부 노드들을 훈련에 참여시키지 않고 몇개의 노드를 끊어서, 남은 노드들을 통해서만 훈련시키는 방식이다. 이 때 끊어버리는 노드는 랜덤으로 선택한다. pytorch에서는 기본값이 0.5 다. 즉 절반의 노드를 dropout하고 계산한다. 이렇게 함으로써, training하는 과정에서 Overfitting이 발생하지 않게 할 수 있다.
이제 훈련을 시키자.
criterion = nn.CrossEntropyLoss()

optimizer = optim.SGD(model.parameters(), lr=0.01)

for epoch in range(1000):

  total_loss = 0

  for train_x, train_y in train_loader:

    train_x, train_y = Variable(train_x), Variable(train_y)

    optimizer.zero_grad()

    output = model(train_x)


    loss = criterion(output, train_y)

    loss.backward()

    optimizer.step()

    total_loss += loss.data.item()

  if (epoch+1) % 100 == 0:
    print(epoch+1, total_loss)
훈련 시키는 과정은 크게 다를게 없다. 다만 cuda를 사용했음에도 엄청 느리다.
test_x, test_y = Variable(test_X), Variable(test_Y)
result = torch.max(model(test_x).data, 1)[1]
accuracy = sum(test_y.cpu().data.numpy() == result.cpu().numpy()) / len(test_y.cpu().data.numpy())

accuracy
97.4%의 정확성을 보였다.